A Practical Guide to Testing Live Website Updates, Verifying Customer Workflows, and Protecting Your AI-Powered Business After Publishing
Imagine spending hours creating an exciting improvement for your business website.
You've updated your homepage.
Added a new service.
Improved your Contact form.
Redesigned your navigation.
Updated your AI assistant.
Or connected a new automation.
You've reviewed the changes.
Completed your testing.
And approved the update.
Everything looks ready!
You open your website builder.
You click Publish.
And your new changes are officially live!
What an exciting moment!
But here's an important question:
HOW DO YOU KNOW EVERYTHING IS ACTUALLY WORKING ON YOUR LIVE WEBSITE?
Just because an update looked correct in a preview doesn't automatically mean every feature will behave the same way after publishing.
A button might lead to the wrong destination.
A mobile menu might behave differently.
An AI assistant might provide unexpected responses.
An email integration might not trigger correctly.
Or a Contact form might fail to save information where it belongs.
That's why post-publish verification matters.
POST-PUBLISH VERIFICATION IS THE PROCESS OF TESTING IMPORTANT WEBSITE FEATURES AFTER AN UPDATE GOES LIVE TO CONFIRM THEY WORK AS EXPECTED.
It helps you move from assuming your website update succeeded to gathering evidence that it works.
Instead of simply clicking Publish and walking away, you complete a structured verification process.
You check important pages.
Test customer workflows.
Review AI assistant behavior.
Verify integrations.
Document results.
And address unexpected problems.
For AI-powered websites, this is especially important because your website may depend on several connected systems.
Your website platform.
Your AI assistant.
Your Contact forms.
Your email notifications.
Your payment services.
Your automations.
And your domain and hosting configuration.
The good news?
YOU DON'T NEED A LARGE TECHNICAL TEAM TO CREATE A PROFESSIONAL POST-PUBLISH VERIFICATION PROCESS.
Even a solo entrepreneur can build a practical checklist that supports website reliability.
In Blog #128, we're exploring 50 strategies to help verify your website after important updates.
PART 1: UNDERSTAND POST-PUBLISH VERIFICATION
1. Know What Publishing Verification Means
Publishing verification checks whether a website update behaves correctly in the live environment.
2. Understand Why Preview Testing Isn't Always Enough
Preview and production environments may differ in configuration, data, integrations, caching, or permissions.
3. Separate Publishing From Verification
Publishing makes a change live.
Verification checks whether the change works.
4. Match Verification to Change Risk
A simple text update may require fewer checks than a change involving payments or customer information.
5. Make Verification a Standard Publishing Habit
Include live testing in your regular website change process.
PART 2: VERIFY WEBSITE AVAILABILITY
6. Open the Live Website
Confirm that your published website can be reached.
7. Check the Updated Page
Verify that the intended changes appear on the live site.
8. Review Important Navigation
Test relevant menu links and buttons.
9. Check for Unexpected Error Pages
Look for broken destinations or unavailable content.
10. Confirm Important Pages Remain Accessible
Verify that essential pages weren't unintentionally affected.
PART 3: VERIFY MOBILE AND RESPONSIVE DESIGN
11. Check the Live Mobile Layout
Review the published website on an appropriate mobile device.
12. Test Mobile Navigation
Confirm that menus open, close, and navigate correctly.
13. Check Button Visibility
Make sure important calls to action remain accessible.
14. Review Text and Image Layouts
Look for clipping, overlapping elements, and unexpected spacing.
15. Test Relevant Screen Sizes
Use representative devices or supported browser testing tools.
PART 4: VERIFY CUSTOMER CONTACT WORKFLOWS
16. Test the Contact Form
Submit safe test information using the live form.
17. Verify Inquiry Storage
Check whether the submission appears in the intended private location.
18. Verify Email Notifications
Confirm that expected notifications arrive.
19. Review Form Validation
Check that required fields and error messages behave appropriately.
20. Confirm Submission Feedback
Verify that customers receive an appropriate confirmation after submitting.
PART 5: VERIFY AI ASSISTANT BEHAVIOR
21. Test Common Customer Questions
Ask representative questions about services, contact information, and policies.
22. Verify Updated Knowledge
Check that the assistant reflects approved information.
23. Review Response Accuracy
Compare answers with official business information.
24. Check for Unsupported Promises
Look for invented prices, guarantees, deadlines, or services.
25. Test Human Handoff
Verify that customers can reach an appropriate contact method when AI assistance is insufficient.
PART 6: VERIFY INTEGRATIONS AND AUTOMATIONS
26. Review Email Integrations
Check whether important email workflows function correctly.
27. Verify Connected Forms
Confirm that submitted information reaches the intended system.
28. Test Automations Safely
Use test data and provider-supported procedures to check relevant workflows.
29. Review Payment Workflows When Applicable
Use approved test modes or other safe verification methods instead of creating unnecessary real transactions.
30. Check Integration Errors
Review relevant status information or error reports where available.
PART 7: VERIFY SECURITY, PRIVACY, AND ACCESSIBILITY
31. Review Access Permissions
Confirm that updates haven't introduced inappropriate administrative or customer access.
32. Check Customer Data Handling
Verify that information is collected and stored only as intended.
33. Review Publicly Visible Information
Look for accidental exposure of private content or internal details.
34. Test Important Accessibility Features
Check relevant keyboard navigation, labels, focus behavior, and other accessibility requirements.
35. Escalate Serious Concerns
If a significant security or privacy issue appears, follow the appropriate incident response procedure.
PART 8: DOCUMENT PUBLISHING VERIFICATION
36. Create a Verification Record
Assign a unique identifier to the post-publish review.
37. Record the Publishing Date
Document when the update went live.
38. Identify the Tested Features
List the pages, workflows, and integrations included in the review.
39. Record Actual Test Results
Use consistent labels such as Pass, Fail, Needs Review, or Not Tested.
40. Keep Appropriate Evidence
Store useful test references without exposing customer data or sensitive credentials.
PART 9: RESPOND TO FAILED VERIFICATION
41. Prioritize Important Failures
Focus on security, privacy, payments, and critical customer workflows.
42. Document Unexpected Problems
Explain what failed and how it was discovered.
43. Determine the Appropriate Response
Consider correction, rollback, recovery, or escalation depending on the issue.
44. Retest After Corrective Action
Verify that the problem has been resolved.
45. Update Related Records
Connect verification findings with your issue tracker, maintenance log, and change request.
PART 10: IMPROVE POST-PUBLISH RELIABILITY
46. Review Recurring Publishing Problems
Identify failures that happen repeatedly after updates.
47. Improve Pre-Publish Testing
Use post-publish findings to strengthen future test cases.
48. Establish a Monitoring Period
Continue checking relevant website functions after significant releases.
49. Review Verification Completion
Track whether required post-publish checks are being completed.
50. Make Verification Part of Every Important Release
Treat live verification as a normal part of professional website management.
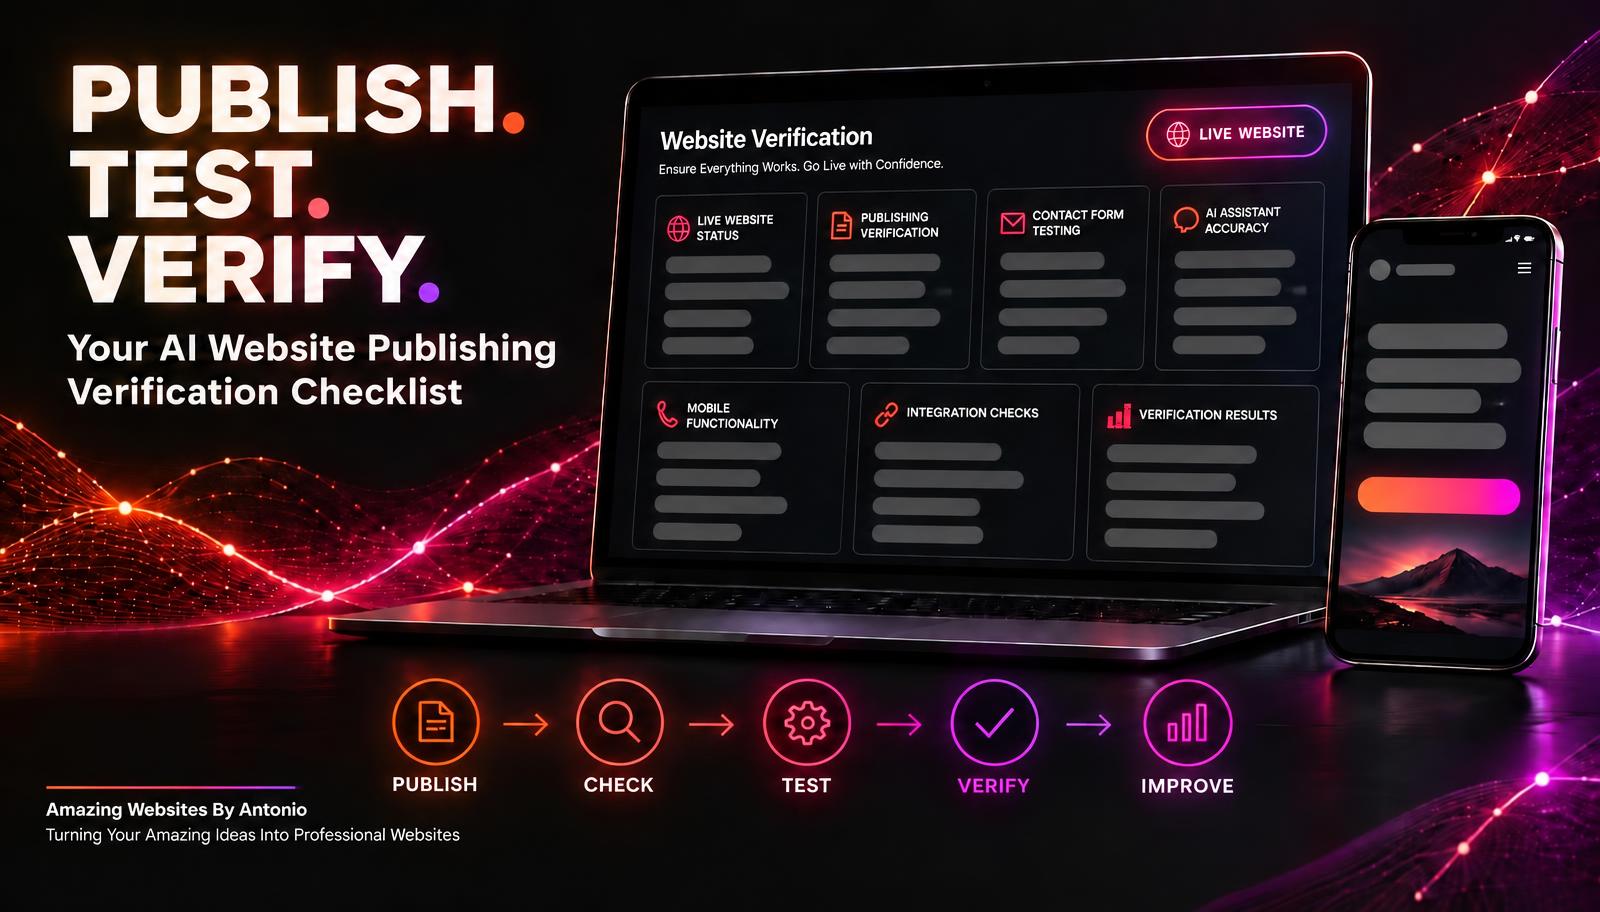
PUBLISH → CHECK → TEST → VERIFY → DOCUMENT → CORRECT → IMPROVE
PRE-PUBLISH TESTING VS. POST-PUBLISH VERIFICATION
Both processes are important, but they serve different purposes.
| Pre-Publish Testing | Post-Publish Verification |
|---|---|
| Occurs before an update goes live | Occurs after an update goes live |
| Uses preview or testing environments where available | Uses the live website |
| Identifies problems before release | Identifies problems in the published environment |
| Supports approval decisions | Confirms release outcomes |
| Helps prevent avoidable failures | Helps detect and respond to unexpected failures |
IMPORTANT:
Successful pre-publish testing doesn't eliminate the need for live verification.
And successful post-publish verification doesn't guarantee that future problems will never occur.
Both processes help strengthen website reliability.
YOUR AI WEBSITE PUBLISHING VERIFICATION MATRIX
Use this illustrative matrix to organize your post-publish checks.
| Website Area | Verification Action | Expected Result |
|---|---|---|
| Homepage | Open the live homepage | Page loads correctly |
| Navigation | Test important menu links | Correct destinations open |
| Mobile Layout | Review representative mobile screens | Content remains usable |
| Contact Form | Submit a safe test inquiry | Submission is stored correctly |
| Email Notification | Review expected notification | Notification arrives |
| AI Assistant | Ask approved test questions | Responses meet defined criteria |
| Automation | Perform supported test workflow | Expected action occurs |
| Accessibility | Test relevant interactions | Required behavior works |
| Security | Review affected access settings | No inappropriate access introduced |
| Publishing Record | Document test results | Verification history is complete |
The exact checks should depend on what changed.
For example, a simple headline update may not require testing every integration.
But a major Contact form change should include the related storage and notification workflows.
CREATE YOUR POST-PUBLISH VERIFICATION DASHBOARD
A verification dashboard can help you track whether important release checks have been completed.
Consider tracking:
- Total published changes
- Releases awaiting verification
- Completed verification reviews
- Passed checks
- Failed checks
- Checks requiring investigation
- Untested critical workflows
- Rollbacks or recovery actions
- Outstanding corrective actions
- Verified releases
FICTIONAL DASHBOARD EXAMPLE
| Metric | Example |
|---|---|
| Published Changes | 12 |
| Verification Reviews Completed | 9 |
| Awaiting Verification | 3 |
| Passed Checks | 36 |
| Failed Checks | 2 |
| Needs Review | 4 |
| Rollbacks | 1 |
These are fictional figures, not actual results for Amazing Websites By Antonio.
Remember: A release should not be marked fully verified simply because some tests passed.
All required acceptance criteria must be addressed.
UNDERSTANDING VERIFICATION STATUS LABELS
Use consistent terminology.
PASS
The test met its documented acceptance criteria.
FAIL
The test did not meet its acceptance criteria.
NEEDS REVIEW
The result requires further investigation.
NOT TESTED
The verification activity has not been performed.
NOT APPLICABLE
The check doesn't apply to the change.
BLOCKED
The test cannot proceed because of an unresolved dependency.
Keeping these labels consistent makes verification records easier to understand.
COMPLETE AI WEBSITE PUBLISHING VERIFICATION CHECKLIST
SECTION 1 — WEBSITE AVAILABILITY
- Live website is accessible.
- Updated page displays correctly.
- Important navigation works.
- Relevant buttons open the correct destinations.
- No unexpected error pages were found.
SECTION 2 — MOBILE EXPERIENCE
- Mobile layout is reviewed.
- Mobile navigation works.
- Important buttons are accessible.
- Text remains readable.
- Images and page sections display correctly.
SECTION 3 — CUSTOMER WORKFLOWS
- Contact form is tested where relevant.
- Test submission is stored correctly.
- Expected notification arrives.
- Required field validation works.
- Submission confirmation displays appropriately.
SECTION 4 — AI ASSISTANT
- Common customer questions are tested.
- Updated business information is accurate.
- Unsupported promises are addressed.
- Human handoff works.
- Relevant privacy behavior is reviewed.
SECTION 5 — INTEGRATIONS
- Email integration is verified where affected.
- Relevant form connections work.
- Important automations are tested safely.
- Payment workflows are verified using appropriate methods.
- Relevant error reports are reviewed.
SECTION 6 — SECURITY AND ACCESSIBILITY
- Administrative permissions are appropriate.
- Customer information is handled correctly.
- No unintended private content is publicly exposed.
- Relevant accessibility checks are completed.
- Serious concerns are escalated.
SECTION 7 — VERIFICATION RECORDS
- Publishing date is recorded.
- Verification ID is assigned.
- Tested features are listed.
- Actual results are documented.
- Appropriate evidence is retained.
SECTION 8 — FINAL REVIEW
- Failed checks are investigated.
- Corrective actions are documented.
- Important fixes are retested.
- Related maintenance records are updated.
- Monitoring responsibilities are assigned.
- Final verification status is recorded.
COPY-READY AI WEBSITE PUBLISHING VERIFICATION REPORT
BUSINESS NAME:
[Enter Business Name]
WEBSITE:
[Enter Website Address]
VERIFICATION ID:
[Enter Identifier]
RELATED CHANGE REQUEST:
[Enter Change ID]
PUBLISHING DATE:
[Enter Date]
VERIFICATION DATE:
[Enter Date]
VERIFIED BY:
[Enter Name]
SECTION 1 — PUBLISHED CHANGE
CHANGE TITLE:
[Enter Title]
CHANGE DESCRIPTION:
[Describe Published Update]
AFFECTED PAGES:
[List Pages]
AFFECTED FEATURES:
[List Features]
AFFECTED INTEGRATIONS:
[List Integrations]
SECTION 2 — WEBSITE AVAILABILITY
LIVE WEBSITE ACCESSIBLE:
Yes / No / Not Tested
UPDATED PAGE VERIFIED:
Pass / Fail / Needs Review / Not Tested
NAVIGATION VERIFIED:
Pass / Fail / Needs Review / Not Tested
COMMENTS:
[Enter Findings]
SECTION 3 — MOBILE VERIFICATION
DEVICES OR SCREEN SIZES TESTED:
[List Devices or Sizes]
MOBILE NAVIGATION RESULT:
Pass / Fail / Needs Review / Not Tested
LAYOUT RESULT:
Pass / Fail / Needs Review / Not Tested
COMMENTS:
[Enter Findings]
SECTION 4 — CUSTOMER WORKFLOW VERIFICATION
CONTACT FORM TEST REQUIRED:
Yes / No
FORM SUBMISSION RESULT:
Pass / Fail / Needs Review / Not Tested / Not Applicable
INQUIRY STORAGE RESULT:
Pass / Fail / Needs Review / Not Tested / Not Applicable
EMAIL NOTIFICATION RESULT:
Pass / Fail / Needs Review / Not Tested / Not Applicable
COMMENTS:
[Enter Findings]
SECTION 5 — AI ASSISTANT VERIFICATION
AI CHANGE INVOLVED:
Yes / No
TEST QUESTIONS:
[List Representative Questions or Safe References]
EXPECTED ANSWERS:
[Describe Approved Information]
ACTUAL RESULTS:
[Summarize Results]
AI VERIFICATION STATUS:
Pass / Fail / Needs Review / Not Tested / Not Applicable
SECTION 6 — SECURITY AND PRIVACY
ACCESS REVIEW REQUIRED:
Yes / No
ACCESS REVIEW RESULT:
[Enter Result]
CUSTOMER DATA REVIEW RESULT:
[Enter Result]
OUTSTANDING CONCERNS:
[List Concerns or None Identified]
SECTION 7 — FAILED CHECKS
FAILED TEST IDENTIFIERS:
[List IDs or None]
ISSUE DESCRIPTIONS:
[Describe Problems]
SEVERITY:
Critical / High / Medium / Low
CORRECTIVE ACTIONS:
[List Actions]
ACTION OWNER:
[Enter Name]
TARGET DATE:
[Enter Date]
SECTION 8 — RECOVERY OR ROLLBACK
RECOVERY REQUIRED:
Yes / No / Under Review
RECOVERY ACTION:
[Describe Action or Not Applicable]
RECOVERY VERIFICATION RESULT:
[Enter Result]
SECTION 9 — FINAL VERIFICATION
FINAL STATUS:
Verified / Partially Verified / Failed / Pending
REQUIRED CHECKS COMPLETED:
Yes / No
OUTSTANDING ISSUES:
[List Issues]
MONITORING PLAN:
[Describe Follow-Up Checks]
NEXT REVIEW DATE:
[Enter Date]
FINAL NOTES:
[Enter Details]
EXAMPLE AI WEBSITE POST-PUBLISH VERIFICATION SCENARIO
The following scenario is fictional.
Situation: A Business Owner Publishes an Improved Contact Form
A business owner has updated a website Contact form.
The new form includes a service selection field so customers can indicate what type of assistance they need.
The update has passed the required pre-publish checks.
Now it's time to verify the live website.
Step 1 — Open the Published Website
The owner visits the live Contact page.
Step 2 — Confirm the New Field Appears
The service selection field is visible.
Step 3 — Test the Form
The owner submits safe test information.
Step 4 — Verify Private Storage
The owner checks whether the inquiry was saved correctly.
Step 5 — Verify Email Notifications
The owner checks whether the expected notification arrived.
Step 6 — Review Mobile Behavior
The owner opens the form on a mobile device and checks its layout.
Step 7 — Check Submission Feedback
The owner verifies that the expected confirmation appears after submitting.
Step 8 — Record the Results
Each test receives an appropriate verification status.
Step 9 — Address Any Failures
If the notification doesn't arrive, the owner investigates the issue instead of marking the release fully verified.
Step 10 — Complete the Verification Report
Once all required checks pass, the owner documents the final result.
LESSON:
Publishing an update is not the same as verifying its success.
A structured post-publish checklist helps confirm that important customer workflows work in the live environment.
YOUR 30-DAY AI WEBSITE PUBLISHING VERIFICATION IMPLEMENTATION PLAN
WEEK 1 — DEFINE LIVE VERIFICATION REQUIREMENTS
- Identify critical website functions.
- Review common website changes.
- Define post-publish acceptance criteria.
- Establish verification status labels.
- Create a standard verification checklist.
GOAL: Build a consistent verification process.
WEEK 2 — CREATE TESTING PROCEDURES
- Define navigation checks.
- Establish mobile testing requirements.
- Create Contact form test procedures.
- Add AI assistant verification questions.
- Document integration testing methods.
GOAL: Make live testing practical and repeatable.
WEEK 3 — PRACTICE POST-PUBLISH VERIFICATION
- Select a suitable low-risk website update.
- Complete the normal change approval process.
- Publish the update.
- Perform the required live tests.
- Document verification results.
GOAL: Practice a complete publishing and verification workflow.
WEEK 4 — REVIEW AND IMPROVE
- Review completed verification reports.
- Identify recurring problems.
- Improve testing checklists.
- Update maintenance records.
- Establish future monitoring habits.
GOAL: Make post-publish verification part of ongoing website management.
THE AI WEBSITE PUBLISHING VERIFICATION FRAMEWORK
PUBLISH
Release the approved website update.
↓
CHECK
Confirm that the live website is accessible.
↓
TEST
Perform relevant functional and customer workflow checks.
↓
VERIFY
Compare actual results with expected behavior.
↓
DOCUMENT
Record testing evidence and outcomes.
↓
CORRECT
Address failed checks and unexpected problems.
↓
MONITOR
Continue reviewing important functions after significant releases.
↓
IMPROVE
Use findings to strengthen future publishing procedures.
FINAL THOUGHTS
Creating a professional website is an exciting achievement.
It allows customers to discover your services.
Explore your work.
Learn about your brand.
And connect with your business.
But as your website grows, you'll continue making improvements.
New pages.
Updated services.
Better navigation.
Improved Contact forms.
More helpful AI assistants.
And new automations.
Publishing those changes is exciting.
But publishing is only one part of the process.
You also need to confirm that the live website works as expected.
That's why post-publish verification matters.
It helps you identify unexpected problems.
Protect important customer workflows.
Verify AI assistant behavior.
Review integrations.
And document successful improvements.
DON'T JUST PUBLISH YOUR WEBSITE UPDATES. VERIFY THAT THEY WORK.
Start with a practical checklist.
Test the features affected by your changes.
Review the results.
Address important failures.
And keep improving your publishing process.
Because successful website management isn't only about creating new features.
IT'S ABOUT MAKING SURE THOSE FEATURES CONTINUE TO SERVE YOUR CUSTOMERS AFTER THEY GO LIVE.
PUBLISH WITH PURPOSE.
VERIFY WITH CARE.
PROTECT THE CUSTOMER EXPERIENCE.
KEEP BUILDING BETTER WEBSITES.
Amazing Websites By Antonio
Turning Your Amazing Ideas Into Professional Websites